
 Pin it
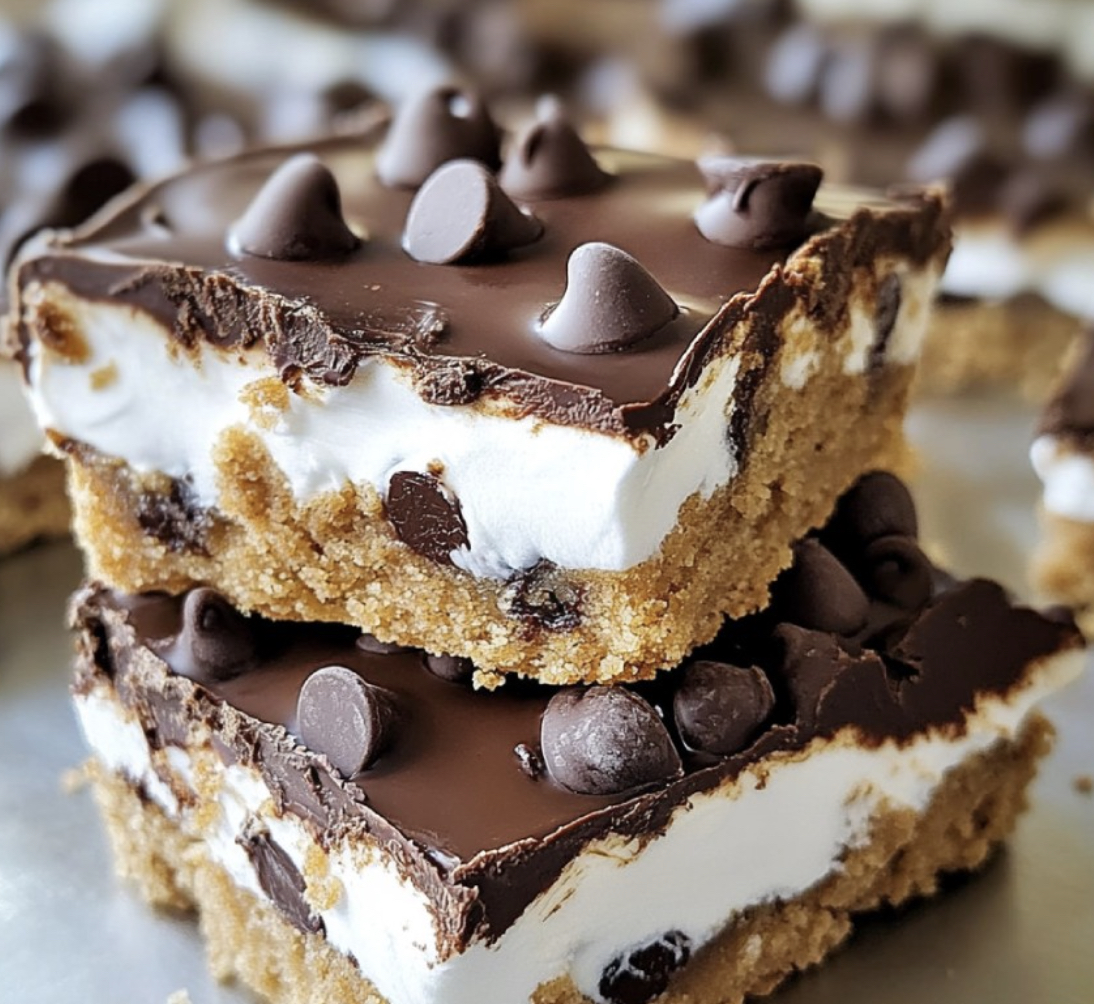
Chocolate Marshmallow Cookie Bars transform an ordinary dessert moment into a celebration of textures and flavors. These triple-layer treats feature a chewy chocolate chip cookie base, a pillowy marshmallow center, and a rich chocolate topping that creates the perfect balance of sweetness. The combination delivers a nostalgic s'mores-inspired experience without the campfire, making these bars ideal for family gatherings, potlucks, or simply satisfying your sweet tooth on a quiet evening.
The first time I made these bars for my sister's birthday gathering, they disappeared within minutes. My niece actually asked if I'd bought them from a bakery, which I consider the highest compliment!
Ingredients:
- Unsalted butter (1 cup, softened): The foundation of our cookie base, providing richness and that irreplaceable buttery flavor. Make sure it's truly softened but not melted for the best texture.
- Brown sugar (1 cup, packed): Adds moisture and a caramel-like depth that granulated sugar alone can't provide. Dark or light brown both work well.
- Granulated sugar (1/2 cup): Creates the perfect balance of sweetness and helps with the cookie structure.
- Large eggs (2): Act as binders for the cookie base and provide structure. Room temperature eggs incorporate better.
- Vanilla extract (2 teaspoons): Enhances all the other flavors. Always use pure rather than imitation for the best taste.
- All-purpose flour (2 1/2 cups): The structural backbone of our cookie base. Measure by spooning into measuring cups and leveling off for accuracy.
- Baking soda (1 teaspoon): Provides the perfect amount of lift for a chewy rather than cakey texture.
- Salt (1/2 teaspoon): Balances sweetness and enhances flavor profiles. Don't skip this!
- Chocolate chips (1 1/2 cups): Creates pockets of melty chocolate throughout the cookie base. Semi-sweet provides the best flavor balance.
- Marshmallow creme (2 cups): Creates our pillowy middle layer. Using creme rather than whole marshmallows prevents air gaps in your bars.
- Semi-sweet chocolate chips for topping (2 cups): Forms our glossy top layer. Semi-sweet balances sweetness better than milk chocolate.
- Coconut oil or butter (2 tablespoons): Makes the chocolate topping smooth and easier to cut without cracking.
Step-by-Step Cooking Instructions:
- 1. Prep Your Space
- Begin by positioning your oven rack in the middle position and preheating to exactly 350°F (175°C). Take the time to thoroughly grease your 9x13-inch baking dish, making sure to get into the corners. I find that a light coating of cooking spray followed by a parchment paper sling with overhang on the long sides makes for foolproof removal later.
- 2. Create Your Cookie Base Mixture
- Pull out your stand mixer fitted with the paddle attachment (or use a hand mixer) and beat the softened butter for about 30 seconds until smooth. Add both sugars and cream together for a full 2-3 minutes until the mixture becomes notably lighter in both color and texture. This step is crucial for incorporating air into your dough, so don't rush it.
- 3. Incorporate Wet Ingredients
- Add each egg one at a time, mixing for about 30 seconds after each addition until fully incorporated. Scrape down the sides of the bowl with a rubber spatula to ensure everything mixes evenly. Pour in the vanilla extract and blend just until combined, being careful not to overmix.
- 4. Add Dry Ingredients
- In a separate bowl, thoroughly whisk together the flour, baking soda, and salt to ensure even distribution of leavening agents. Add this dry mixture to your wet ingredients in three portions, mixing on low speed just until each addition disappears. The dough should look slightly underdone to prevent tough cookies.
- 5. Finalize and Bake Cookie Base
- Gently fold in the chocolate chips using a rubber spatula, ensuring they're evenly distributed without overmixing. Press the dough into your prepared baking dish, taking time to create an even layer all the way to the edges. Use slightly damp hands or the back of a measuring cup to prevent sticking. Bake for exactly 20-25 minutes, watching for golden brown edges and a surface that looks set but is still slightly soft in the center.
- 6. Cool Completely
- Allow the cookie base to cool entirely in the pan set on a wire rack. This will take at least 1-2 hours. Patience is crucial here – adding marshmallow creme to a warm base will create a melty mess rather than distinct layers.
- 7. Create Marshmallow Layer
- Once cooled, use an offset spatula to spread the marshmallow creme in an even layer across the entire cookie base. For easier spreading, lightly coat your spatula with cooking spray to prevent sticking. Work from the center outward with gentle strokes to avoid pulling up cookie crumbs.
- 8. Prepare Chocolate Topping
- In a microwave-safe bowl, combine chocolate chips and coconut oil. Microwave in short 30-second intervals, stirring thoroughly between each interval even if the chips don't look melted. This prevents scorching. Continue until the mixture is completely smooth with no lumps.
- 9. Finish Assembly
- Pour the melted chocolate over the marshmallow layer while it's still warm and fluid. Tilt the pan gently to help the chocolate reach the edges, then use an offset spatula to create a perfectly even surface. Tap the pan gently on the counter a few times to eliminate air bubbles.
- 10. Set and Slice
- Allow the bars to set completely before cutting. For clean edges, refrigerate for at least 1 hour, then use a sharp knife heated under hot water and wiped dry between cuts. For the perfect presentation, trim the edges before cutting into 12 even squares.
My grandmother always said that a little butter makes everything better, and these bars prove her right. When I make these with European-style butter with a higher fat content, the cookie base takes on an almost shortbread-like quality that even my picky husband can't resist. He claims the marshmallow layer reminds him of childhood fluffernutter sandwiches, but "all grown up."
Storage Tips for Maximum Freshness
These Chocolate Marshmallow Cookie Bars maintain their delicious texture for up to 5 days when stored properly. The key is layering them between sheets of parchment paper in an airtight container to prevent sticking. Keep them at room temperature if your house stays cool, or refrigerate during warmer months. I've found that the flavors actually deepen and meld beautifully after the first day, making these ideal for preparing ahead of special occasions. If you need to store them longer, they freeze beautifully for up to 3 months – just thaw them in the refrigerator overnight before serving.
Variations to Make This Recipe Your Own
The versatility of these cookie bars makes them perfect for customization based on seasonal ingredients or personal preferences. Try switching the semi-sweet chocolate chips in the cookie base for white chocolate chips and adding dried cranberries for a holiday version. For a nutty twist, incorporate 1/2 cup of toasted chopped pecans or walnuts into the cookie dough. My personal favorite variation is adding a teaspoon of espresso powder to the cookie base, which deepens the chocolate flavor without tasting like coffee. The beauty of this recipe lies in its forgiving nature – almost any addition will work beautifully as long as you keep the dry-to-wet ingredient ratio balanced.
Serving Suggestions for Maximum Impact
While these bars are undeniably delicious on their own, elevating them for special occasions creates memorable dessert experiences. Try warming individual squares for 10-15 seconds in the microwave and serving them with a small scoop of vanilla bean ice cream for a decadent contrast of warm and cold. For dinner parties, cut them into smaller bite-sized pieces and arrange them on a platter with fresh berries and mint leaves for an elegant presentation. During the holiday season, I like to drizzle them with a touch of caramel sauce and a sprinkle of flaky sea salt just before serving, which transforms them into a sophisticated dessert worthy of your finest china and candlelight.
Frequently Asked Questions
- → Can I use mini marshmallows instead of marshmallow creme?
Yes, you can substitute mini marshmallows for the marshmallow creme. Spread about 3 cups of mini marshmallows over the baked cookie base, then return to the oven for 2-3 minutes until they're puffy but not browned. Remove from oven and immediately spread with a greased spatula to create an even layer before adding the chocolate topping.
- → How should I store these cookie bars?
Store the bars in an airtight container. They can be kept at room temperature for 2-3 days or refrigerated for up to a week. If stacking the bars, place parchment paper between layers to prevent sticking. The bars can also be frozen for up to 3 months - just thaw at room temperature before serving.
- → Can I make these bars ahead of time?
Absolutely! These bars are perfect for make-ahead desserts. You can prepare them 1-2 days before serving. The flavors actually develop and meld together nicely as they sit. Just be sure to store them properly in an airtight container.
- → What's the best way to cut these bars neatly?
For clean cuts, chill the bars in the refrigerator until the chocolate layer is firm. Use a sharp knife dipped in hot water and wiped dry between cuts. You can also use a plastic knife which surprisingly cuts through the marshmallow layer without sticking.
- → Can I add other mix-ins to the cookie base?
Definitely! The cookie base is versatile and can handle additional mix-ins. Try adding 1/2 cup chopped nuts, crushed pretzels, or even toffee bits for extra flavor and texture. Just be careful not to add more than 1 cup of extra ingredients to maintain the proper consistency.
- → What can I substitute for coconut oil in the chocolate topping?
If you don't have coconut oil, you can use an equal amount of butter, shortening, or even vegetable oil. Each will slightly affect the final texture and setting properties of the chocolate topping. Butter will give a softer set, while shortening will create a firmer top layer.